Alvin Maintenance & Domestic Handrails
This section of our website is intended for installers of maintenance or domestic access handrails in situations where there is no public access, and the area is used for maintenance access or access to/within single family dwellings (including gardens).
The sections below are expandable for more detailed explanations where you see the ⓘ symbol and there is a jargon buster section at the bottom of the page.
Installing Your Handrail
• Don’t fix directly into tarmac or other soft surfaces. ⓘ
Tarmac can compress under load and become very soft in hot sun. Instead, dig out a 400mm x 400mm x 400mm cube and fill with concrete or post-fix mix. Either set the upright tube into the concrete or wait for it to fully cure and then drill and fix with bolts or chemical anchors.
• Don’t fix directly into paving slabs. ⓘ
Ideally use a core-drill to cut a hole slightly larger than the diameter of your upright to a depth of at least 250mm below the paving slab and use chemical anchor resin to fix it into the substrate. If the foundation of the paving is not concrete or similar then you should lift the slab and follow the advice above to form a 400mm cube of concrete, fixing the tube through the paving slab.
• Don’t fix to the top row of bricks or the coping/capping brick on a wall.ⓘ
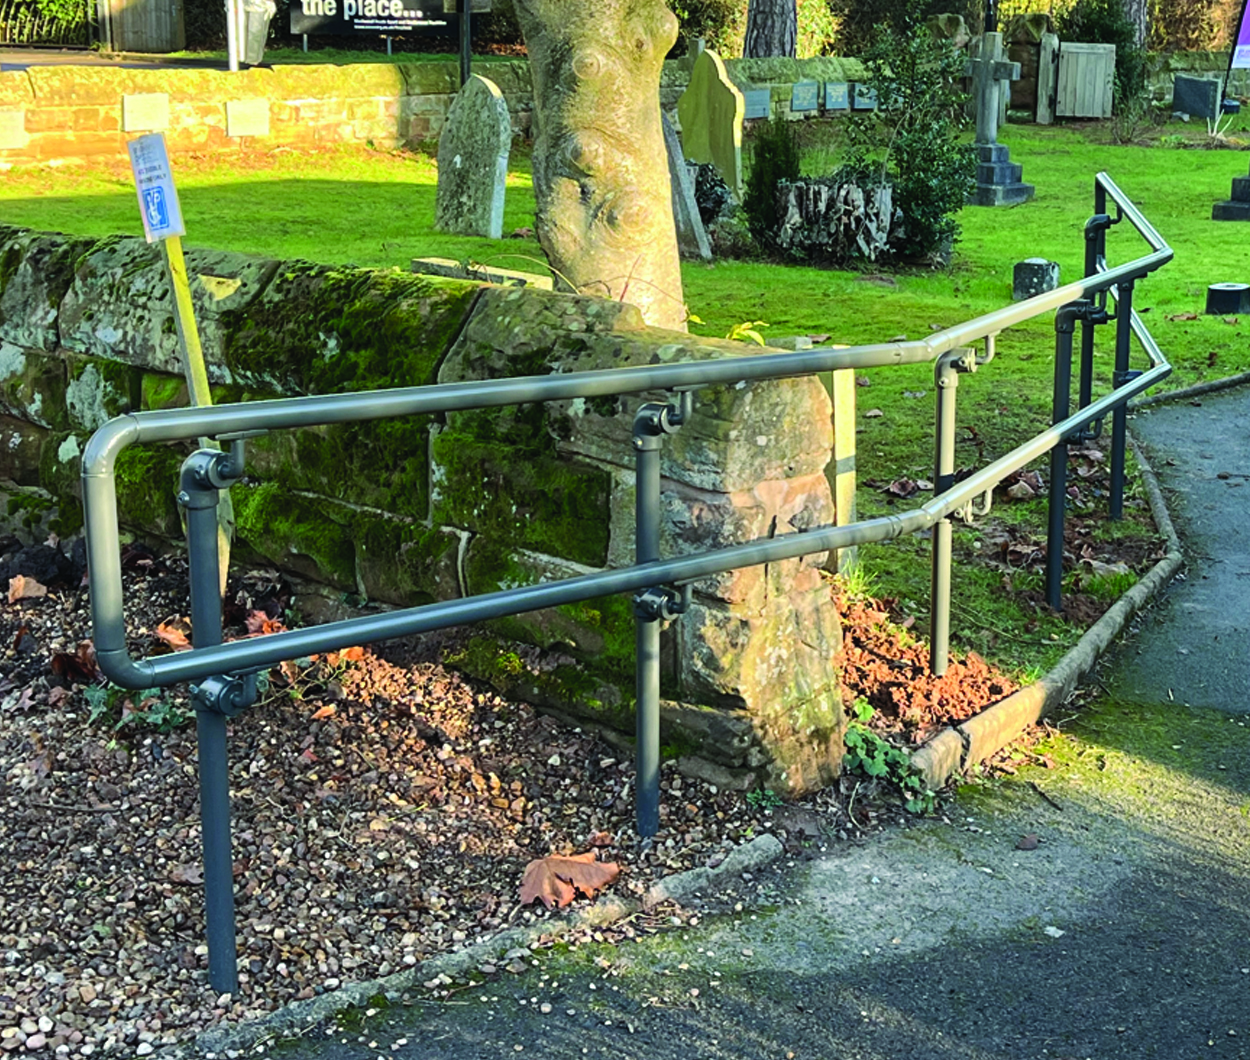
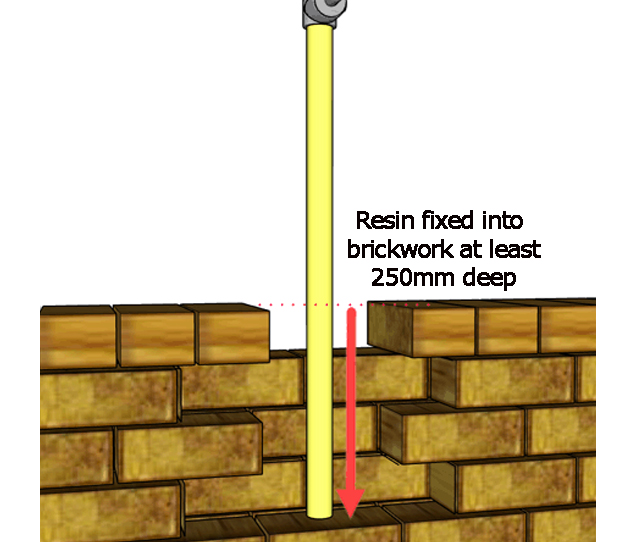
The force applied when someone leans on the handrail will over time fracture the mortar layer between bricks and cause the handrail to lean over. Instead, you should either use a core-drill to cut holes to insert the upright tube at least 250mm into the centre of the wall, securing it with chemical anchor resin; or you could attach to the side of the wall instead, ensuring your top fixing hole is at least 150mm or 3 brick rows down from the top.
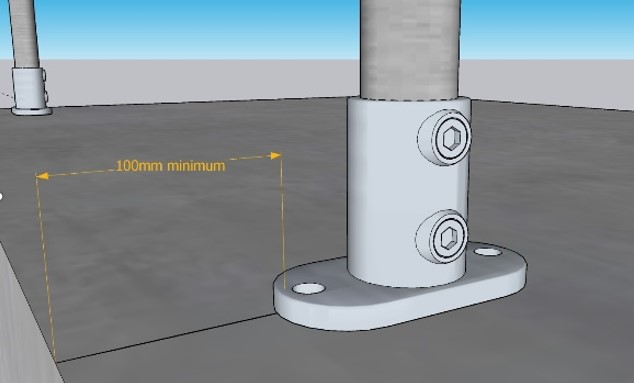
• Keep fixing holes at least 100mm from the edge of the concrete.ⓘ
Holes drilled closer than this risk popping the side off the concrete, particularly when using expansive bolts.
• Choose an appropriate fixing type. ⓘ
Expansive bolts are often the simplest to use, however they are prone to working loose particularly in coarse concrete or softer material, take care not to make the fixing hole too wide.
Chemical anchors provide a better option for fixing into concrete because they do not put large sideways loads on the wall of the fixing hole like expansive bolts do. However, chemical anchors can be harder to remove if the handrail needs to be taken down permanently, typically the fixings will need to be cut back to ground level.
Use galvanised fixings for external handrails, sometimes labelled HDG (hot-dip-galvanised) these fixings will resist corrosion for far longer than BZP (bright zinc plated) fixings.
During installation, grub screws might need to be loosely tightened to start with to allow for easier adjustment as the system comes together. A final step with every system should be to check that every grub screw is tightened to a torque of
Generally, maintenance-only, and domestic access handrails should be strong enough if you keep to the following maximum spacings, which are measured from the centre of one upright to the centre of the next.
Size 7: 1100mm ⓘ
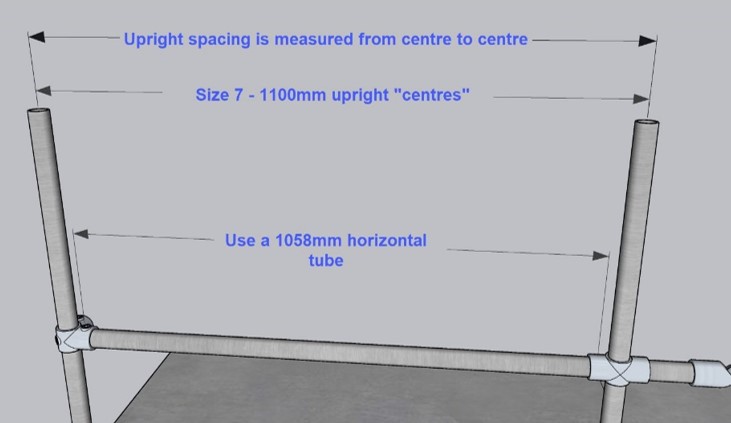
Size 8: 1500mm ⓘ
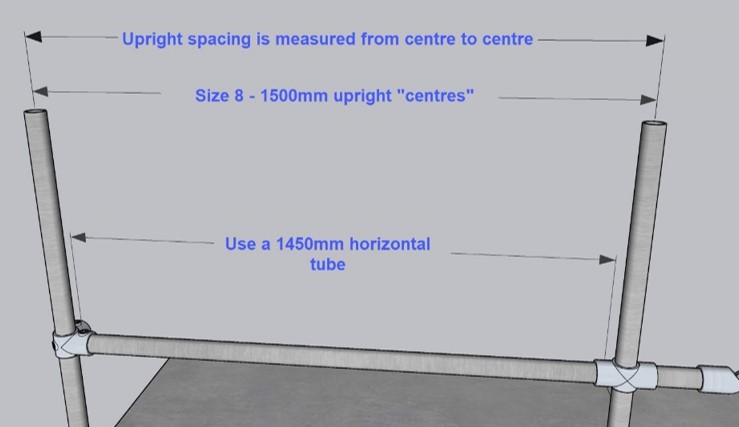
These dimensions assume a good solid chemical anchor fixing into uncracked concrete, however there may be a different spacing for your system as agreed at the time of order. Contact us on 020 8254 2626 if you are unsure.
Ideally you should extend a handrail at least 300mm beyond the top and bottom of steps and ramps, so that the user can have a firm hold of the rail before they negotiate the gradient.
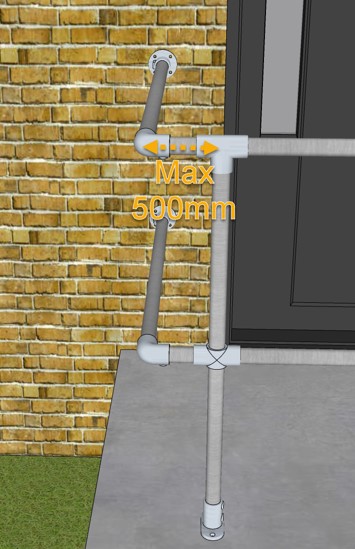
Gradient changes and corners should be offset by up to 500mm from the nearest upright. ⓘ
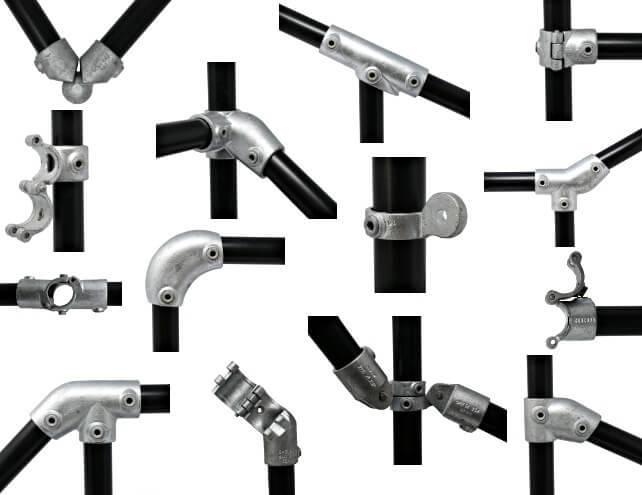
Putting an upright just at the gradient change or corner itself is often difficult due to the changing floor surface or the structure of the steps. The Alvin gradient change and corner kits are useful here because they fit to the horizontal rails in-between uprights. A27 variable elbows form the join between the tubes for gradients and can be adjusted to suit any reasonable ramp or stair gradient up to 65 degrees incline. A06 clamps are used for right-angle corners or the A27s can be used to form obtuse and acute corners.
The only firm rule is that they must be located within 500mm of an upright, which in turn means you can have your supporting uprights either side of the gradient change or corner.
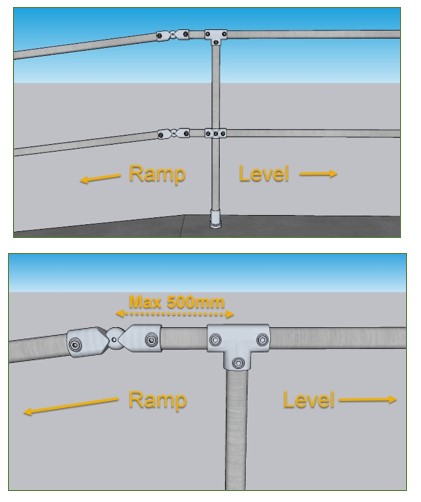
It is often more convenient to form corners slightly offset from the upright. This both simplifies the installation and avoids any trouble with fitting an upright into the corner area itself. ⓘ
As above these corners must be supported by one upright within 500mm. The main advantage is that you don’t need to use different uprights for the corners, which in turn makes the install far simpler.
This is also useful when you are bolting uprights to a raised platform as illustrated below. Finding a suitable fixing point right in the corner can be difficult and sometimes leads to the handrail being set further into the walking space than you would like. In the illustration below you can see that the supporting upright is in a far more manageable position.
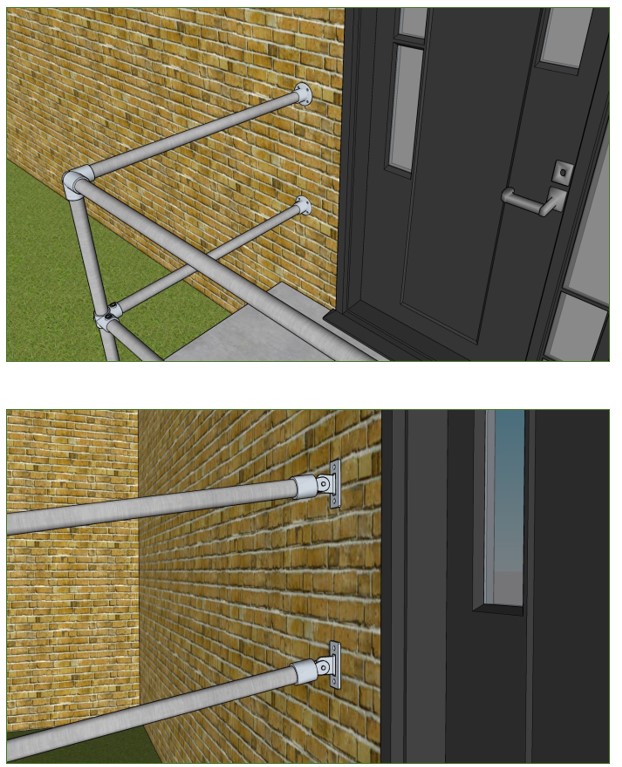
End termination kits use A10 clamps for level terminations at right angles from the wall, or a variable angle bracket A52 supports gradients or obtuse/acute angle attachment to the wall. ⓘ
Please note that additional levels of protection may be required if the handrail needs to provide protection from falling off a raised area. In general, this is required where any drop exceeds 600mm in a private dwelling or 380mm in buildings other than single family dwellings. Further advice is available on our website and by calling us on 020 8254 2626.
Jargon Buster
Expansive bolt: A fixing usually comprised of a bolt and an expansive sleeve. When tightened the sleeve catches on the wall of the fixing hole and as you continue to tighten the bolt, this action causes the sleeve to expand, gripping it against the sides of the hole and holding the key clamp baseplate in place.
Grub Screw: Small screw without a head which is used to lock the tubes into our key clamps. In most cases these require either 1/4 inch or 5/16 inch hex key attachments to tighten them.
Chemical anchor: A fixing comprised of a piece of threaded rod (looks like a bolt with no head), a nut and washer set, and a 2-part epoxy-resin glue delivered from a cartridge using a cartridge gun (this setup looks a lot like a bathroom mastic cartridge and applicator gun). After drilling out the fixing hole and blowing or sucking away any debris, the hole is filled with the resin and the threaded rod (the anchor) is inserted. The glue sets very quickly in most conditions, and you only need to hold the anchor upright for a matter of minutes. The key clamp baseplate then sits over the anchors with them protruding through the holes either side. The nut and washer sets then secure the baseplate onto the anchors. Please read the instructions on the anchor resin packet carefully as they will give you the curing time before you can fully tighten the nuts.
Hot-Dip Galvanised: This is a process applied to our clamps and tube, as well as some fixing bolts, which involves dipping them in molten zinc. This leaves a thin coating of zinc which acts as a sacrificial layer of protection, the zinc reacts with oxygen in the air and water rather than the structural metal underneath, protecting it from rust and significantly extending the lifespan of the item.
Pitch line: This is the line we use to measure the gradient of a ramp or set of steps. It is also the line from which the required handrail height is measured. For steps it is a straight line measured from the edge of the top step, touching the nose of each step on the way down and finishes where the line meets the floor below the bottom step, an easy way to measure this is by laying a plank of wood onto the steps, it should touch the edge of each step. For ramps the pitch line is the same as the walking surface.
Tightening torque: This is the turning force needed to tighten each grub screw sufficiently to ensure the system is strong and ridged. Using a torque wrench with suitable hex-key bit is essential to ensure the screws are not under or over tightened. Please see our list of recommended installation tools here.
Still Need Help?
Discuss your enquiry
Share site photos
Send us plans/drawings

Telephone
London: +44(0)20 8254 2626
Sheffield: +44(0)114 312 2250


